Getting cross platform rendering with Babylon Native and GLFW
Babylon.js is a powerful web-based graphics engine that allows its users to have a fully featured engine that can run on the browser. It provides lots of useful features, from rendering to physics, GUI, input, geometry, loading and so one. The goal for the Babylon Native project is to allow users to use the powerful Babylon.js rendering engine in native applications. This article gives an overview of how to get a cross platform rendering application that can run JavaScript Babylon.js code. I’m also providing a sample Github repo with everything I did:
I will not be covering the full implementation in this article. That’s what the Github repo is for, but I will be focusing on the important concepts for getting a native application to work with Babylon Native.
Setup the Git repo
In order to make the project cross platform we will be creating a CMake based C++ project. This allows us to integrate nicely with Babylon Native and GLFW(which both use CMake). This is also good for cross platform development since it will generate a native solution (a Visual Studio project on Windows, an XCode project on Mac, etc.). More information on CMake can be found on their documentation page (CMake).
We will also be including Babylon Native and GLFW as submodules in the Dependencies folder. This is for convenience since both of them are very easy to setup this way.
Lastly, but not least. Babylon Native is not a re-implementation of the Babylon.js engine done in native code! It is a project that creates the infrastructure needed for the JavaScript engine to run under a native application! This means that we will also need Babylon.js JavaScript code. We will get it using npm packages. So before running any CMake it is required that npm install is called after cloning the repo. For most platforms this will be (see the full instructions on the repo):
git clone https://github.com/SergioRZMasson/BabylonNativeGLFW.git
cd BabylonNativeGLFW
npm install
mkdir build
cd build
cmake .. -G PLATFORM_GENERATOR
With PLATFORM_GENERATOR been “Xcode” on Mac and “Visual Studio 16 2019” on Windows.
Setting up GLFW
GLFW is a cross platform API for handling window management as well as input. It is very easy to use and provides support for Windows Mac and Linux. It also provides support for many rendering backends.
For more detailed information on how to properly use GLFW, I would recommend visiting their website. They have very good documentation and most of the things there should apply directly to this project.
However, there are some specific setups that we need to do in order for it to work well with our rendering. First of all, we will need access to the native window handler for each platform we run. We must pass that handler when creating the Babylon Native Renderer, so it knows where to draw to. To get that GLFW provides a set of defines that can be set before including its headers.
We define the TARGET_PLATFORM_ on CMake based on the current platform CMake is running. With this we than set the appropriate GLFW defines.
#define GLFW_INCLUDE_NONE
#include <GLFW/glfw3.h>#if TARGET_PLATFORM_LINUX
#define GLFW_EXPOSE_NATIVE_X11#elif TARGET_PLATFORM_OSX
#define GLFW_EXPOSE_NATIVE_COCOA#elif TARGET_PLATFORM_WINDOWS
#define GLFW_EXPOSE_NATIVE_WIN32#endif#include <GLFW/glfw3native.h>
We also created a abstraction for getting the native window handler from GLFW, this uses the same TARGET_PLATFORM_ define to call the appropriate function depending on the platform we are running:
static void *glfwNativeWindowHandle(GLFWwindow *_window)
{
#if TARGET_PLATFORM_LINUX
return (void *)(uintptr_t)glfwGetX11Window(_window);#elif TARGET_PLATFORM_OSX
return ((NSWindow *)glfwGetCocoaWindow(_window)).contentView;#elif TARGET_PLATFORM_WINDOWS
return glfwGetWin32Window(_window);
#endif // TARGET_PLATFORM_}
Finally, we must also set the flag GLFW_CLIENT_API to GLFW_NO_API before creating our window. This way GLFW will not try to manage any graphics API under the hood.
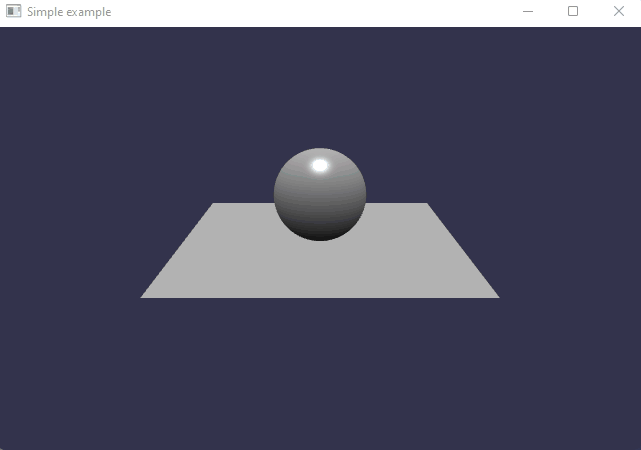
glfwWindowHint(GLFW_CLIENT_API, GLFW_NO_API);auto window = glfwCreateWindow(INITIAL_WIDTH, INITIAL_HEIGHT, "Simple example", NULL, NULL);
For more details on how to setup a GLFW window please see the official GLFW documentation. (An OpenGL library | GLFW)
Initializing Babylon Native Graphics
Babylon Native hides its graphics infrastructure under two main objects Babylon::Graphics::Device and Babylon::Graphics::DeviceUpdate. The first one is used to handle integration with bgfx, and the second will be used to sync the rendering loop with the engine Babylon.js running in the JavaScript thread.
When it comes to rendering, Babylon.js will have its drawing related calls (that normally would be done using WebGL or WebGPU in the browser) forwarded to the Native Engine. Those will not call bgfx directly, they will be placed on a command buffer that will be filled with all the drawing operations required to draw the current frame.
Babylon::Graphics::Device::StartRenderingCurrentFrame will perform all operations on bgfx required to setup a new frame.
Babylon::Graphics::DeviceUpdate::Start allows the JavaScript thread to start running its rendering loop.
Babylon::Graphics::DeviceUpdate::Finish waits for JavaScript rendering to finish. This ensures that all the drawing commands are in the command buffer.
Babylon::Graphics::Device::FinishRenderingCurrentFrame will loop through the command buffer and actually call the native graphics APIs. Performing the actual rendering.
To create those objects the main thing our application needs to provide is the native window handler. For this we will use the glfwNativeWindowHandle described previously.
Babylon::Graphics::WindowConfiguration graphicsConfig{};graphicsConfig.Window = glfwNativeWindowHandle(window);
graphicsConfig.Width = width;
graphicsConfig.Height = height;
graphicsConfig.MSAASamples = 4;device = Babylon::Graphics::Device::Create(graphicsConfig);update = std::make_unique<Babylon::Graphics::DeviceUpdate>(device
->GetUpdate("update"));device->StartRenderingCurrentFrame();
update->Start();
After creating those objects, we immediately call StartRenderingCurrentFrame() and Start(). This allows the Javascript thread to run, even though we will not be doing any rendering yet. Since we will be dealing with the Javascript runtime next, we need it to be able to run.
Initializing Javascript runtime
The Babylon::AppRuntime allows us to interact with the Javascript runtime. It is required for initializing other components, but it also can be used to call JavaScript functions and objects directly from C++.
runtime = std::make_unique<Babylon::AppRuntime>();Using the Dispatch method, we can call a C++ lambda in the JavaScript thread. This also gives us access to the Javascript environment, which can be used by other parts of Babylon Native.
runtime->Dispatch([](Napi::Env env)
{
   device->AddToJavaScript(env);

   //Initialize more Plugins here...

   Babylon::Plugins::NativeEngine::Initialize(env);
});
Render!
Having everything setup we can finally start rendering our scene. On the glfw update loop we just need 4 lines of code:
while (!glfwWindowShouldClose(window))
{
    if (device)
    {
        update->Finish();
        device->FinishRenderingCurrentFrame();
        device->StartRenderingCurrentFrame();
        update->Start();
    }
    glfwPollEvents();
}
The update->Finish() will wait for the Javascript thread to finish its update loop and it will lock it. This is required since JavaScript interacts with the renderer using a Command Buffer. Graphics calls are not executed immediately, they are placed in a buffer storing all graphics commands from the babylon.js engine.
Once that’s done the JavaScript thread will not do any work and we will use bgfx to actually do all the drawing using:
device->FinishRenderingCurrentFrame();This will fill the glfw backbuffer with our frame data, ready to be presented to the user. After that we do:
device->StartRenderingCurrentFrame();This will make sure that the renderer is ready to receive new rendering commands to its Command Queue. And finally:
update->Start();Will free the Javascript thread to start a new rendering loop.
Imgui
Sometimes it can be useful to have a GUI API that can be called from C++ side independently from the Javascript runtime. This can be used for dynamically loading scripts for example or resetting the JavaScript runtime to get the changes made to the JavaScript files.
Imgui is an amazing cross platform API that is designed from the ground up to be easily integrated with multiple rendering APIs and window backends. It has native integration with GLFW for receiving input events but also allows us to decide how we want to render it.
On the sample repo I added a backend implementation for Imgui that allows it to be used with Babylon Native. It’s basically taken from the bgfx backend implementation that can be found on bfgx project, with the caveat that we schedule the rendering to be done after all Babylon Native rendering was finished.
Final thoughts
Babylon Native can be an amazing option for projects that are interested in doing cross platform 3D rendering. It brings compatibility with javascript code development for Babylon.js on the browser, allowing native rendering to match the one done on the web.
For mobile development we also have the Babylon React Native project, that uses Babylon Native to allow Babylon.js to be used in React Native applications. For more information on that please visit (Babylon React Native (babylonjs.com).
References
Babylon Native: The Journey So Far | by Babylon.js | Medium
Babylon React Native: Bringing 3D and XR to React Native Applications | by Babylon.js | Medium
Sergio R. Z. Masson — Babylon.js Team